
Common Ball Valve Problems & How to Fix ThemBall valves are one of the most reliable valve types in industrial service. They open and close with a quarter turn. They seal tightly in both directions. They handle a wide range of pressures and temperatures. And in normal service conditions, with the right material selection, they last for years without needing much attention.
But “reliable” doesn’t mean “maintenance-free.” Ball valves develop problems. Seats wear. Stems leak. Handles seize. Bodies crack under thermal stress. And when a ball valve fails in a critical process line, the maintenance team needs answers fast — not a vague checklist from a manufacturer brochure that doesn’t actually help them diagnose what’s wrong.
This guide covers the most common ball valve problems that plant engineers and maintenance teams encounter. For each problem, we cover what’s actually causing it, how to diagnose it correctly, and how to fix it — both short-term and permanently. We’ve also included guidance on when a repair makes sense and when the valve needs replacing.
Flowjet Valve has supplied ball valves to process industries across Gujarat and India for years. These troubleshooting notes come from real field experience — not a theoretical manual.
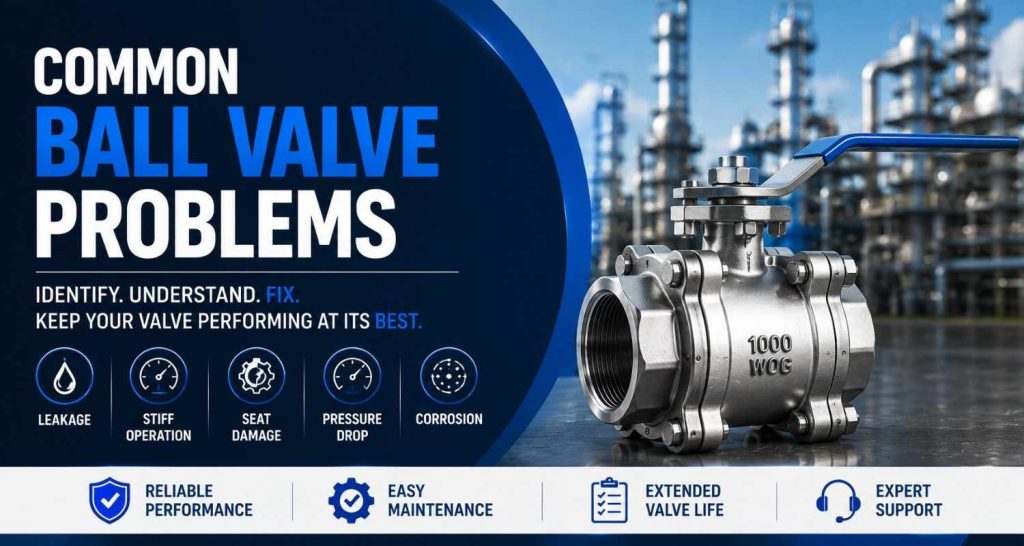
Problem 1: Ball Valve Leaking From the Body (External Leak)
What It Looks Like
Process fluid appears on the outside of the valve body. It might be a drip. It might be a steady seep. In gas service, it’s detectable by smell or by a leak-detection spray. In liquid service, you’ll see staining, pooling, or visible moisture on the valve exterior.
What’s Causing It
External leakage from a ball valve body almost always comes from one of three places.
The body joint. Two-piece and three-piece ball valves have a joint between the body sections. This joint is sealed with a gasket or an O-ring. If that seal fails — due to thermal cycling, over-tightening during previous maintenance, or simple age — process fluid finds its way out.
The end connections. Where the valve connects to the pipeline — threaded, flanged, or socket-weld — improper installation or gradual loosening can create a leak path. Threaded connections in particular can loosen over time in systems with vibration or thermal cycling.
Body casting defects. Less common, but it happens. A porosity defect in the valve body casting — a void in the metal — can allow fluid to permeate through the body wall under pressure. This is a manufacturing defect and requires a replacement, not a repair.
How to Diagnose It
Dry the valve exterior thoroughly. Bring it to operating pressure. Watch closely to identify exactly where the leak originates. A liquid dye or soapy water test helps pinpoint the source. Mark the location before depressurising.
If the leak is at the body joint, check whether the joint bolts (on three-piece designs) are at the correct torque. Under-torqued body bolts are a common cause. If the leak is at an end connection, check thread engagement and sealant condition. If the leak appears to come through the body wall, that’s a casting defect — the valve needs replacing.
How to Fix It
Body joint leak: Depressurise and isolate the line. On three-piece ball valves, re-torque the body bolts in a cross pattern to the manufacturer’s specified torque. If re-torquing doesn’t stop the leak, the body O-ring or gasket needs replacing. Disassemble, inspect the sealing faces for damage, replace the seal, and reassemble.
End connection leak (threaded): Remove the valve, clean the threads thoroughly, apply fresh thread sealant (PTFE tape for water service, anaerobic sealant for higher pressure or temperature), and reinstall. Don’t overtighten — it doesn’t improve the seal and can crack female fittings.
End connection leak (flanged): Check flange bolt torque. If correct, the gasket may have failed. Replace the gasket with the correct material for the service condition.
Casting defect: Replace the valve. There is no field repair for body porosity.
Problem 2: Ball Valve Leaking From the Stem (Packing Leak)
What It Looks Like
Fluid appears at the stem — the shaft that connects the handle or actuator to the ball. The leak appears around the stem seal area, directly below where the handle attaches to the valve body.
What’s Causing It
The stem passes through the valve body and is sealed with packing — a compressed sealing material (typically PTFE or graphite) that prevents process fluid from travelling up the stem to the atmosphere. Stem packing leaks when:
- The packing wears due to repeated valve cycling
- Thermal cycling hardens and shrinks the packing material
- The stem itself develops wear grooves from long-term use
- The packing gland nut loosens over time due to vibration
- The wrong packing material was used for the service temperature
In gas service, stem leaks are particularly serious. Even a small stem seal leak in a flammable or toxic gas service is a safety incident.
How to Diagnose It
Apply soapy water or leak detection spray around the stem area with the valve at operating pressure. Bubbles or visible fluid confirm a stem seal leak. Check whether the packing gland nut (where present) is properly tightened. A loose gland nut is often the entire cause.
How to Fix It
Step one: With the line depressurised and isolated, try tightening the packing gland nut slightly. A quarter to half turn is often enough to restore the seal if the packing hasn’t fully worn. Don’t overtighten — it increases operating torque and accelerates stem wear.
Step two: If tightening doesn’t resolve the leak, the packing needs replacing. Disassemble the stem assembly. Remove the old packing rings carefully. Inspect the stem surface for scoring or wear grooves — a damaged stem surface will cause new packing to fail quickly too.
Step three: Install new packing of the correct material for the service. PTFE packing suits most general water and chemical service. Graphite packing handles high-temperature steam and elevated temperature applications better. Install rings one at a time, staggering the joints.
Step four: Reassemble, pressurise gradually, and recheck. A small amount of initial weeping during pressurisation is normal as the packing seats — it should stop within minutes.
If stem wear is significant, replacing the stem is the correct solution. Flowjet Valve stocks replacement stems and packing kits for their ball valve range — making this repair straightforward rather than a full valve replacement.
Problem 3: Ball Valve Not Sealing — Passing Fluid in Closed Position
What It Looks Like
The valve is in the fully closed position but fluid continues to flow downstream. In liquid service, you’ll see flow on the downstream side that shouldn’t exist. In gas service, you’ll hear flow or detect it with a leak detector. The valve visually appears closed but doesn’t seal.
This is one of the most common ball valve problems — and one of the most operationally disruptive, because it defeats the entire purpose of the valve.
What’s Causing It
Seat wear. Ball valve seats — typically PTFE or a reinforced PTFE compound — wear over time, especially in service with abrasive particles, frequent cycling, or thermal cycling. A worn seat no longer makes full contact with the ball surface and the seal fails.
Ball surface damage. Scratches, erosion marks, or corrosion pitting on the ball surface prevent it from sealing against the seat. Even minor surface damage creates a leak path that only gets worse over time.
Wrong seat material for the service. PTFE seats deform under temperatures above their rating. If the service temperature exceeds the seat material’s limit, the seat deforms permanently and the valve no longer seals properly even when returned to normal temperature.
Debris caught between ball and seat. In particulate-laden service, a solid particle caught between the ball and seat prevents full closure. This can happen suddenly and is often confused with seat wear on initial inspection.
Incorrect valve sizing. A valve operating consistently at very low partial-opening positions experiences high fluid velocity across a small gap, which accelerates erosion of both the ball surface and the seat.
How to Diagnose It
Fully close the valve. Check downstream pressure or flow. If the valve is on a line that can be isolated downstream, pressure build-up downstream of a properly sealing valve should stop. Continued pressure rise or visible flow confirms passing.
Remove the valve for inspection. Examine the ball surface for scratches, pitting, or erosion marks. Examine the seat faces for wear, deformation, or embedded debris.
How to Fix It
Debris between ball and seat: Cycle the valve fully open and closed several times to try to flush the particle. If accessible, disassemble and clean. Reassemble and test.
Seat wear: Replace the seats. On most two-piece and three-piece ball valves, seats are replaceable without replacing the entire valve. Flowjet Valve supplies replacement seat kits for their ball valve range in PTFE, reinforced PTFE, and other materials.
Ball surface damage: Minor surface damage can sometimes be polished out using appropriate lapping compound and technique. Significant damage — deep scratches, pitting, erosion — requires ball replacement. Flowjet Valve’s technical team can advise whether a ball is restorable or needs replacement based on the damage pattern.
Wrong seat material: Replace with the correct seat material for the actual service temperature. Check the application details with a ball valve manufacturer who can confirm the right material combination.
Problem 4: Stiff or Seized Handle — Hard to Operate
What It Looks Like
The ball valve handle is difficult to turn. In severe cases, it won’t move at all. In less severe cases, operating torque has increased gradually to the point where a maintenance tool is needed to operate a valve that should turn easily by hand.
What’s Causing It
Over-tightened packing. The most common cause. When a stem leak is addressed by aggressively tightening the packing gland, the resulting friction makes the stem difficult to rotate.
Seat deformation or swelling. PTFE seats can swell in certain chemical environments or deform under excessive temperature. A deformed seat grips the ball surface and dramatically increases operating torque.
Corrosion of the stem or stem threads. External corrosion of the stem, particularly in outdoor or high-humidity installations without proper protection, can seize the stem mechanism entirely.
Scale or deposit build-up inside the valve. In water service with high mineral content, scale builds up on the ball surface and inside the body, increasing friction.
Actuator misalignment (on actuated valves). On pneumatic or electric actuated ball valves, a misaligned actuator mounting can transmit off-axis forces to the stem, making operation stiff or impossible.
How to Fix It
Over-tightened packing: Back off the packing gland nut slightly. Test operating torque. Repeat carefully until the valve operates smoothly while still holding the stem seal.
Seat deformation: Disassemble the valve and inspect the seat condition. If deformed, replace the seats with the correct material for the service. Check the application conditions — temperature, chemical compatibility — to ensure the replacement material won’t repeat the failure.
Stem corrosion: Apply penetrating lubricant to the stem. Allow it to work. Attempt operation. If the stem is seized beyond freeing, the valve needs to be removed and disassembled under controlled conditions. Severe corrosion may require stem replacement or full valve replacement.
Scale build-up: Disassemble and clean. For valves in high mineral-content water service, periodic cleaning or the specification of a ball valve design with body drain ports makes maintenance easier.
Problem 5: Handle Position Doesn’t Match Valve Position
What It Looks Like
The handle appears to be in the open position but the valve is closed — or vice versa. Or the handle moves freely without operating the valve at all.
What’s Causing It
Sheared stem or stem key. The stem that connects the handle to the ball can shear — particularly if excessive force is used to operate a stiff valve. The handle moves but the ball doesn’t.
Handle slippage on the stem flat. Handles attach to stems via a flat or key arrangement. If the handle fastening loosens or the flat wears, the handle can rotate without rotating the stem.
Stop plate or travel limiter damage. Ball valves have mechanical stops that limit rotation to 90 degrees. A damaged or incorrectly positioned stop plate can allow the handle to travel beyond or before the correct open/closed position, making the handle position misleading.
How to Fix It
Sheared stem: The stem needs replacing. This requires full valve disassembly. If the stem failure was caused by excessive operating force on a stiff valve, identify and fix the root cause of the stiffness before replacing the stem — otherwise the replacement stem will fail too.
Loose handle: Tighten the handle fastening bolt or replace the handle if the keyway is damaged. Check stem flat condition — if the flat is worn round, the stem needs replacing.
Stop plate issue: Inspect and reset the travel limiters. On actuated valves, recalibrate the actuator end stops.
Problem 6: Ball Valve Failing Prematurely in Chemical Service
What It Looks Like
A ball valve that should last years fails within months. Seats degrade quickly. Body shows surface corrosion or discolouration. Seals swell, harden, or crack. The valve performs adequately initially and then deteriorates faster than expected.
What’s Causing It
Almost always a material mismatch between the valve and the actual service condition.
Standard ball valves come with PTFE seats, stainless steel or brass bodies, and PTFE or NBR stem seals. This material combination suits general water and mild chemical service well. But put it into contact with chlorinated solvents, strong oxidising acids, or concentrated alkalis, and the same materials that work fine on a water line degrade quickly.
A ball valve manufacturer who doesn’t ask about chemical compatibility before supplying a valve — or a buyer who doesn’t provide those details — creates this failure mode at the specification stage.
How to Fix It
Immediate: Replace the failed valve with one correctly specified for the chemical service. Provide the chemical name, concentration, and operating temperature to the ball valve manufacturer at the time of enquiry.
Long-term: Review the specification process for valves going into chemical service. Material selection should be driven by actual chemical compatibility data — not by what’s standard or what’s in stock.
Flowjet Valve’s technical team helps buyers confirm material compatibility before supplying ball valves for chemical service. Providing the right information at the enquiry stage prevents this failure from happening at all.
Problem 7: Water Hammer — Banging or Shuddering on Valve Operation
What It Looks Like
A loud bang, thud, or series of shudders occurs when the ball valve is operated — opened or closed. It may be violent enough to move the pipe or shake adjacent equipment. In severe cases it causes pipe joint leaks or fitting failures.
What’s Causing It
Water hammer occurs when a rapidly closing valve abruptly stops a moving column of fluid. The momentum of the fluid has nowhere to go — it converts to a pressure spike that travels through the piping as a shock wave.
Ball valves are particularly prone to causing water hammer because they open and close very quickly — a quarter turn can go from fully open to fully closed in less than a second. In high-velocity fluid systems, this speed creates severe pressure spikes.
How to Fix It
Slow down valve operation. On manual valves, train operators to close slowly — taking three to five seconds rather than one snap motion. On actuated valves, install flow controls on the actuator air supply to reduce closing speed.
Install surge suppression. Surge arrestors, bladder accumulators, or slow-close check valves downstream can absorb the pressure spike.
Review valve sizing. An oversized ball valve — one that controls flow at a small percentage of its opening — is particularly prone to water hammer. A correctly sized valve operates in the mid-range of its opening, giving better control and reducing hammer risk.
When to Repair vs. When to Replace
This is the practical question every maintenance team faces. Here’s a straightforward framework.
Repair makes sense when:
- The valve body and ball are in good condition and only seats or seals need replacing
- The failure is a single-component issue with a known root cause
- Spare parts are readily available from the ball valve manufacturer
- The cost of parts and labour is significantly less than a new valve
- The valve is in a size or specification that’s hard to source quickly
Replace the valve when:
- The ball surface has significant damage that can’t be restored
- The body shows corrosion, erosion, or casting defects
- The same valve has needed repeated repairs in a short period
- The original specification was wrong for the service and a different valve is needed
- The valve is a standard size with a short lead time from your ball valve manufacturer
Flowjet Valve supplies both replacement valves and spare parts kits for maintenance repairs — giving maintenance teams the flexibility to choose the right approach for their specific situation.
Choosing a Ball Valve Manufacturer Who Supports You After the Sale
A ball valve is not a one-time purchase. It needs periodic maintenance. It may need spare parts. When something goes wrong, the maintenance team needs technical support — not just a catalogue.
Choosing a ball valve manufacturer who takes after-sales seriously makes every troubleshooting situation faster to resolve. Flowjet Valve, based in Ahmedabad, Gujarat, is set up exactly this way. Standard spare parts — seats, stem seals, body O-rings, packing kits — are available from stock for their ball valve range. The technical team answers compatibility and troubleshooting questions directly. And being based in Gujarat’s industrial belt means delivery to plants across the state happens fast.
For plant engineers and maintenance teams who want a ball valve manufacturer they can rely on beyond the purchase order, Flowjet Valve is the right call.
Summary: Ball Valve Problem Quick Reference
| Problem | Most Likely Cause | First Fix to Try |
| External body leak | Body joint seal failure | Re-torque body bolts / replace gasket |
| Stem leak | Packing wear or loose gland | Tighten gland nut / replace packing |
| Not sealing in closed position | Seat wear or ball damage | Replace seats / inspect ball surface |
| Stiff or seized handle | Over-tight packing or corrosion | Back off gland nut / apply penetrant |
| Handle doesn’t match ball position | Sheared stem or loose handle | Replace stem / tighten handle fastening |
| Premature failure in chemical service | Wrong material for application | Replace with correctly specified valve |
| Water hammer on operation | Fast closure speed | Slow down operation / add surge suppression |
Final Thought
Ball valves fail for predictable reasons. Most failures — leaking stems, worn seats, stiff handles — have straightforward causes and straightforward fixes when you know what to look for. The troubleshooting steps above cover the vast majority of what maintenance teams encounter in the field.
What makes the difference between a quick fix and an extended shutdown is having the right spare parts available, a ball valve manufacturer who supports you with technical guidance, and a maintenance team who can diagnose the root cause rather than just treating the symptom.
Flowjet Valve is that manufacturer for Gujarat’s process industries. Whether the requirement is a replacement valve, a spare parts kit, or a technical conversation about why a valve failed and how to prevent it happening again — the team is available and the parts are in stock.
One Response